
How to Build a Table Saw Crosscut Sled
A crosscut sled can be an extremely helpful jig for the table saw, making certain tasks a breeze. That's why it's usually the first thing most woodworkers tell you to build for your table saw. At its core, a crosscut sled lets you push your stock past the blade on a flat, sliding platform, giving you safe, square crosscuts every time.
Building a crosscut sled is a very easy project; however, there are a few annoying little issues that can be avoided with some helpful tips. So today we'll go over what you'll need and how to make a crosscut sled.
If you're interested in full plans that take you through everything you need and every step of how to cut and build the sled, you can get the plans for my simple crosscut sled here.
Tools and Materials You Will Need
The only tools you'll need for this project are:
a table saw
a drill
a straight edge or long level
clamps
As for the material, I suggest plywood. The reason I recommend plywood over something like MDF comes down to a few things.
Reason one: MDF is heavier than plywood. Given that the sled will already be on the heavy side, making it out of MDF would only make it heavier still.
Reason two: although MDF can be very flat, it's also much more vulnerable to damage, especially from water.
Finally, MDF isn't great at holding screws in place. At times you may have to put some force into your sled, and the last thing you want during a cut is to rip your fence out with your own hands because the screws just pulled straight out.
For all these reasons I suggest going with plywood. Now, not all plywood is made equal, especially for this kind of job, so you'll want to get a higher-grade plywood or birch ply if you can source it. These are usually much better quality than what they stock for building at your local hardware store.
Besides that, you'll also need some wood screws and glue.
Deciding What Type of Crosscut Sled to Build
Before getting stuck into building your crosscut sled, you should pick what kind of crosscut sled you want. Not every sled suits every setup; some sleds work well with table saws that have a larger table and so are terrible with smaller ones, for example.
Here are a few examples of the kinds of sleds you can make:
Full sled (has a front and back fence; usually the one people picture)
Half sled (only has the front fence; good for smaller tables)
Miter sled (sits on one side of the blade)
For today we'll be going over a full sled, because if you can make the full sled then you can make any of the other sleds.
Cutting the Fence Pieces
To start off the build, you'll want to make the fences first, that way you can leave them to glue while building the rest of the sled.
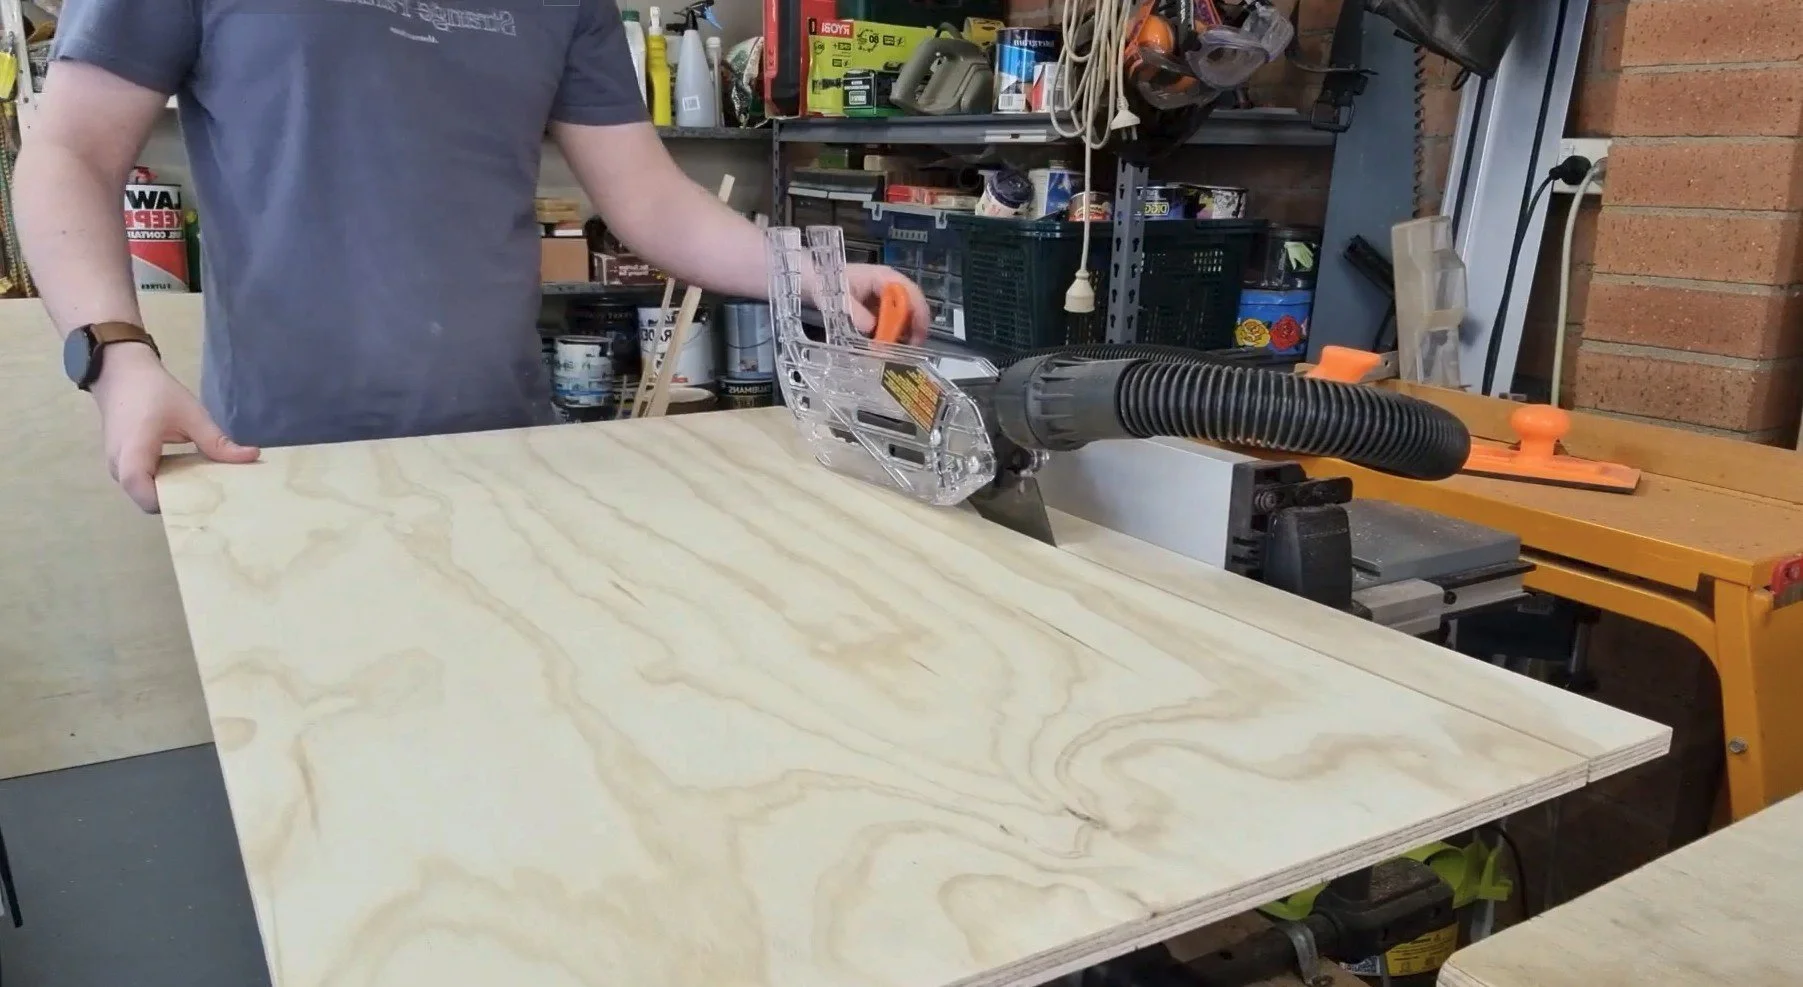
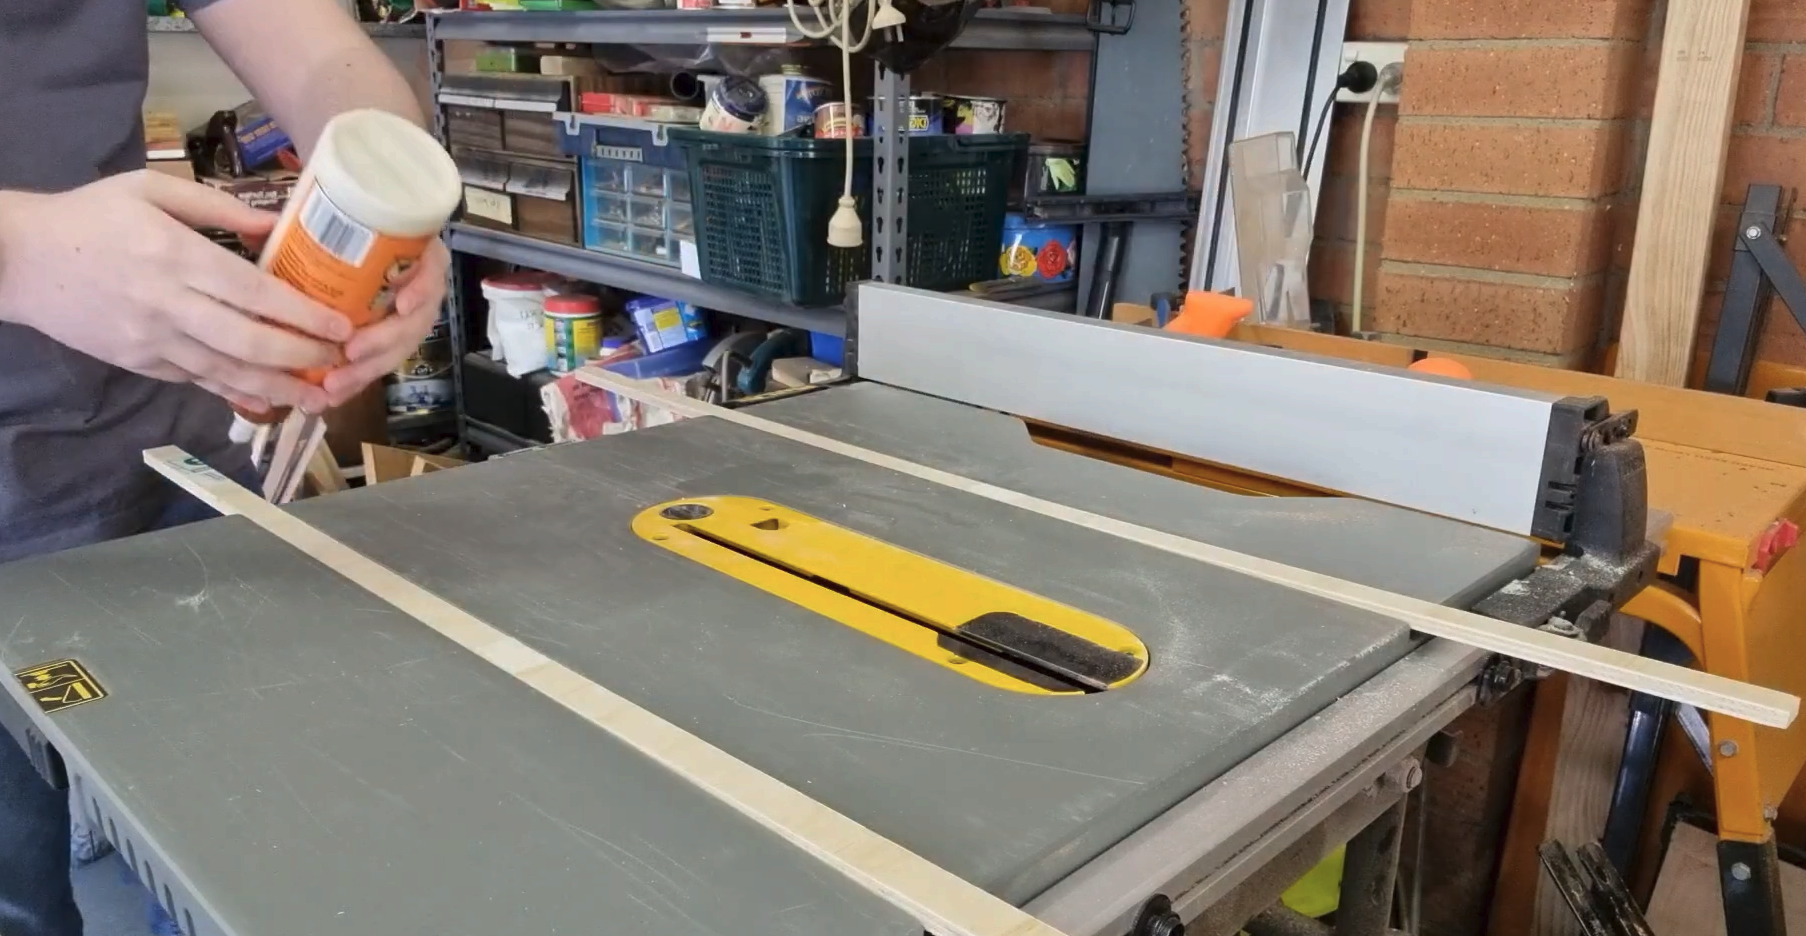
On the table saw, rip 4 strips of plywood, each the same width. Now cut each strip to the same length; this length will be how wide your sled will be.
Then, taking 2 of those strips, glue them together. This will become one of your fences. When applying the glue to the face of the pieces, use a glue brush or a card to spread the glue out evenly across the whole face. We want it fully covered, as we don't want any voids that fail to glue and cause the fence to delaminate over time.
It's important to keep the fence flat when gluing it up. To achieve this, after applying the glue and placing the 2 pieces together, take the face that will be on the inside of the sled and place your straight edge against it. Then clamp the straight edge to the fence. This should set it flat.
Now repeat those steps to make the other fence.
Miter Slot Slides: Build, Buy, or Print
There are a few options when it comes to slot slides for the crosscut sled. You can build them yourself. Some people will build their slides out of hardwood, but I'd recommend building them out of plywood. The reason is that as the seasons change, hardwood slides will expand and contract, which can mean what once fit nice and snug will now bog down or shift too much. That's why I suggest not bothering with the hassle and just building them out of plywood.
Alternatively, these days you can usually buy adjustable miter slot slides. These work nicely and make adjustments a breeze. The only downside is the extra cost.
Or finally, if you have a 3D printer, you can actually print adjustable miter slot slides. I don't know much about 3D printing, so try it at your own skill level.
Cut the Miter Slot Slides and Dial Them In
To cut the slides, measure the width and depth of the miter slots in the base of your table saw and note down the measurements. Then, on the table saw, rip 2 strips set to the width you just measured, and cut them to length.
Now place them into the miter slots. Here's what the strips should and shouldn't feel like:
You don't want to feel the strip shake side to side in the slot (this means the strip is too loose). A way to fix this is to add a strip of tape to the side and see if it gets a little tighter. If it's way too loose, you may need to cut a new strip.
The strips should slide forward and back nicely in the slot without much force. If a strip is too hard to push, sand one of the edges a little and try again until it feels right.
Attach the Base and Slides
First you'll need your base piece. Cut that out of your plywood, making sure its width is equal to the length you cut your fences to. As for how long the base should be, figure out how wide the pieces are that you usually cut on the table saw and make it a bit bigger than that. (As a starting point, a base around 400 to 500 millimeters deep suits a typical contractor saw, but size it to your own work.)
To attach the slides to the base, the easiest way is to put the slides into the miter slots. Then, with either some double-sided tape or fast-cure glue, apply to the top of the slide and lower the base piece down onto the slides. A good way to keep this square is to hold one of the base's edges against your fence as you lower it down.
After lowering it down, press down firmly to get the piece to adhere to the slides, then slowly lift the base off, checking that the slides come with it. If they did, great. Flip the base over so that the slides are now sticking up. With a drill, drill a few countersinks into the slides. Then drive some small screws through the countersinks and into the base piece; this is what will actually hold them together. One note: make sure your screws are short enough that they won't push through the base piece.
Attach the Fences
Start by attaching the back fence. This one is the easiest, as you probably won't reference it for cutting anything, so it doesn't need to be as dialed in as the front. Clamp the back fence to the end of the base (keep the fence's side flush to the end of the base), then countersink screws through the base and into the fence. Use at least 4 screws.
For the front fence we need to be a little more pedantic. Start by setting the fence flush with the front edge of the base. Then countersink one screw through the base on one side. I'd recommend the right side, as you can also use the table saw's fence to help get things square.
Now there are a few methods to get the fence nice and square. If you want to be really precise, you can use the five-cut method (which I'll let you look up yourself; it lets you measure and correct fence squareness down to a tiny fraction of an inch). I want to be precise but I'm not over the top, so I'll go with a much simpler method that still gives good results.
With a framing square big enough for the job, I set the shorter side against the table saw fence, and with the one screw in the sled fence I can pivot the fence to be flush and square against the framing square. Once I'm happy that the fence is nice and square, I clamp the sled fence down to the base. I then countersink one screw from the base into the fence on the opposite side from the first one.
It's a good idea to test how square the fence is before committing. You can do this with the five-cut method, or just cut a few pieces and check them with another square. If you need to make adjustments, simply take out the last screw and pivot the fence in the direction you need. The only thing to watch is that when you go to put the screw back in, drill a new spot or you might just pull the fence back to its original position.
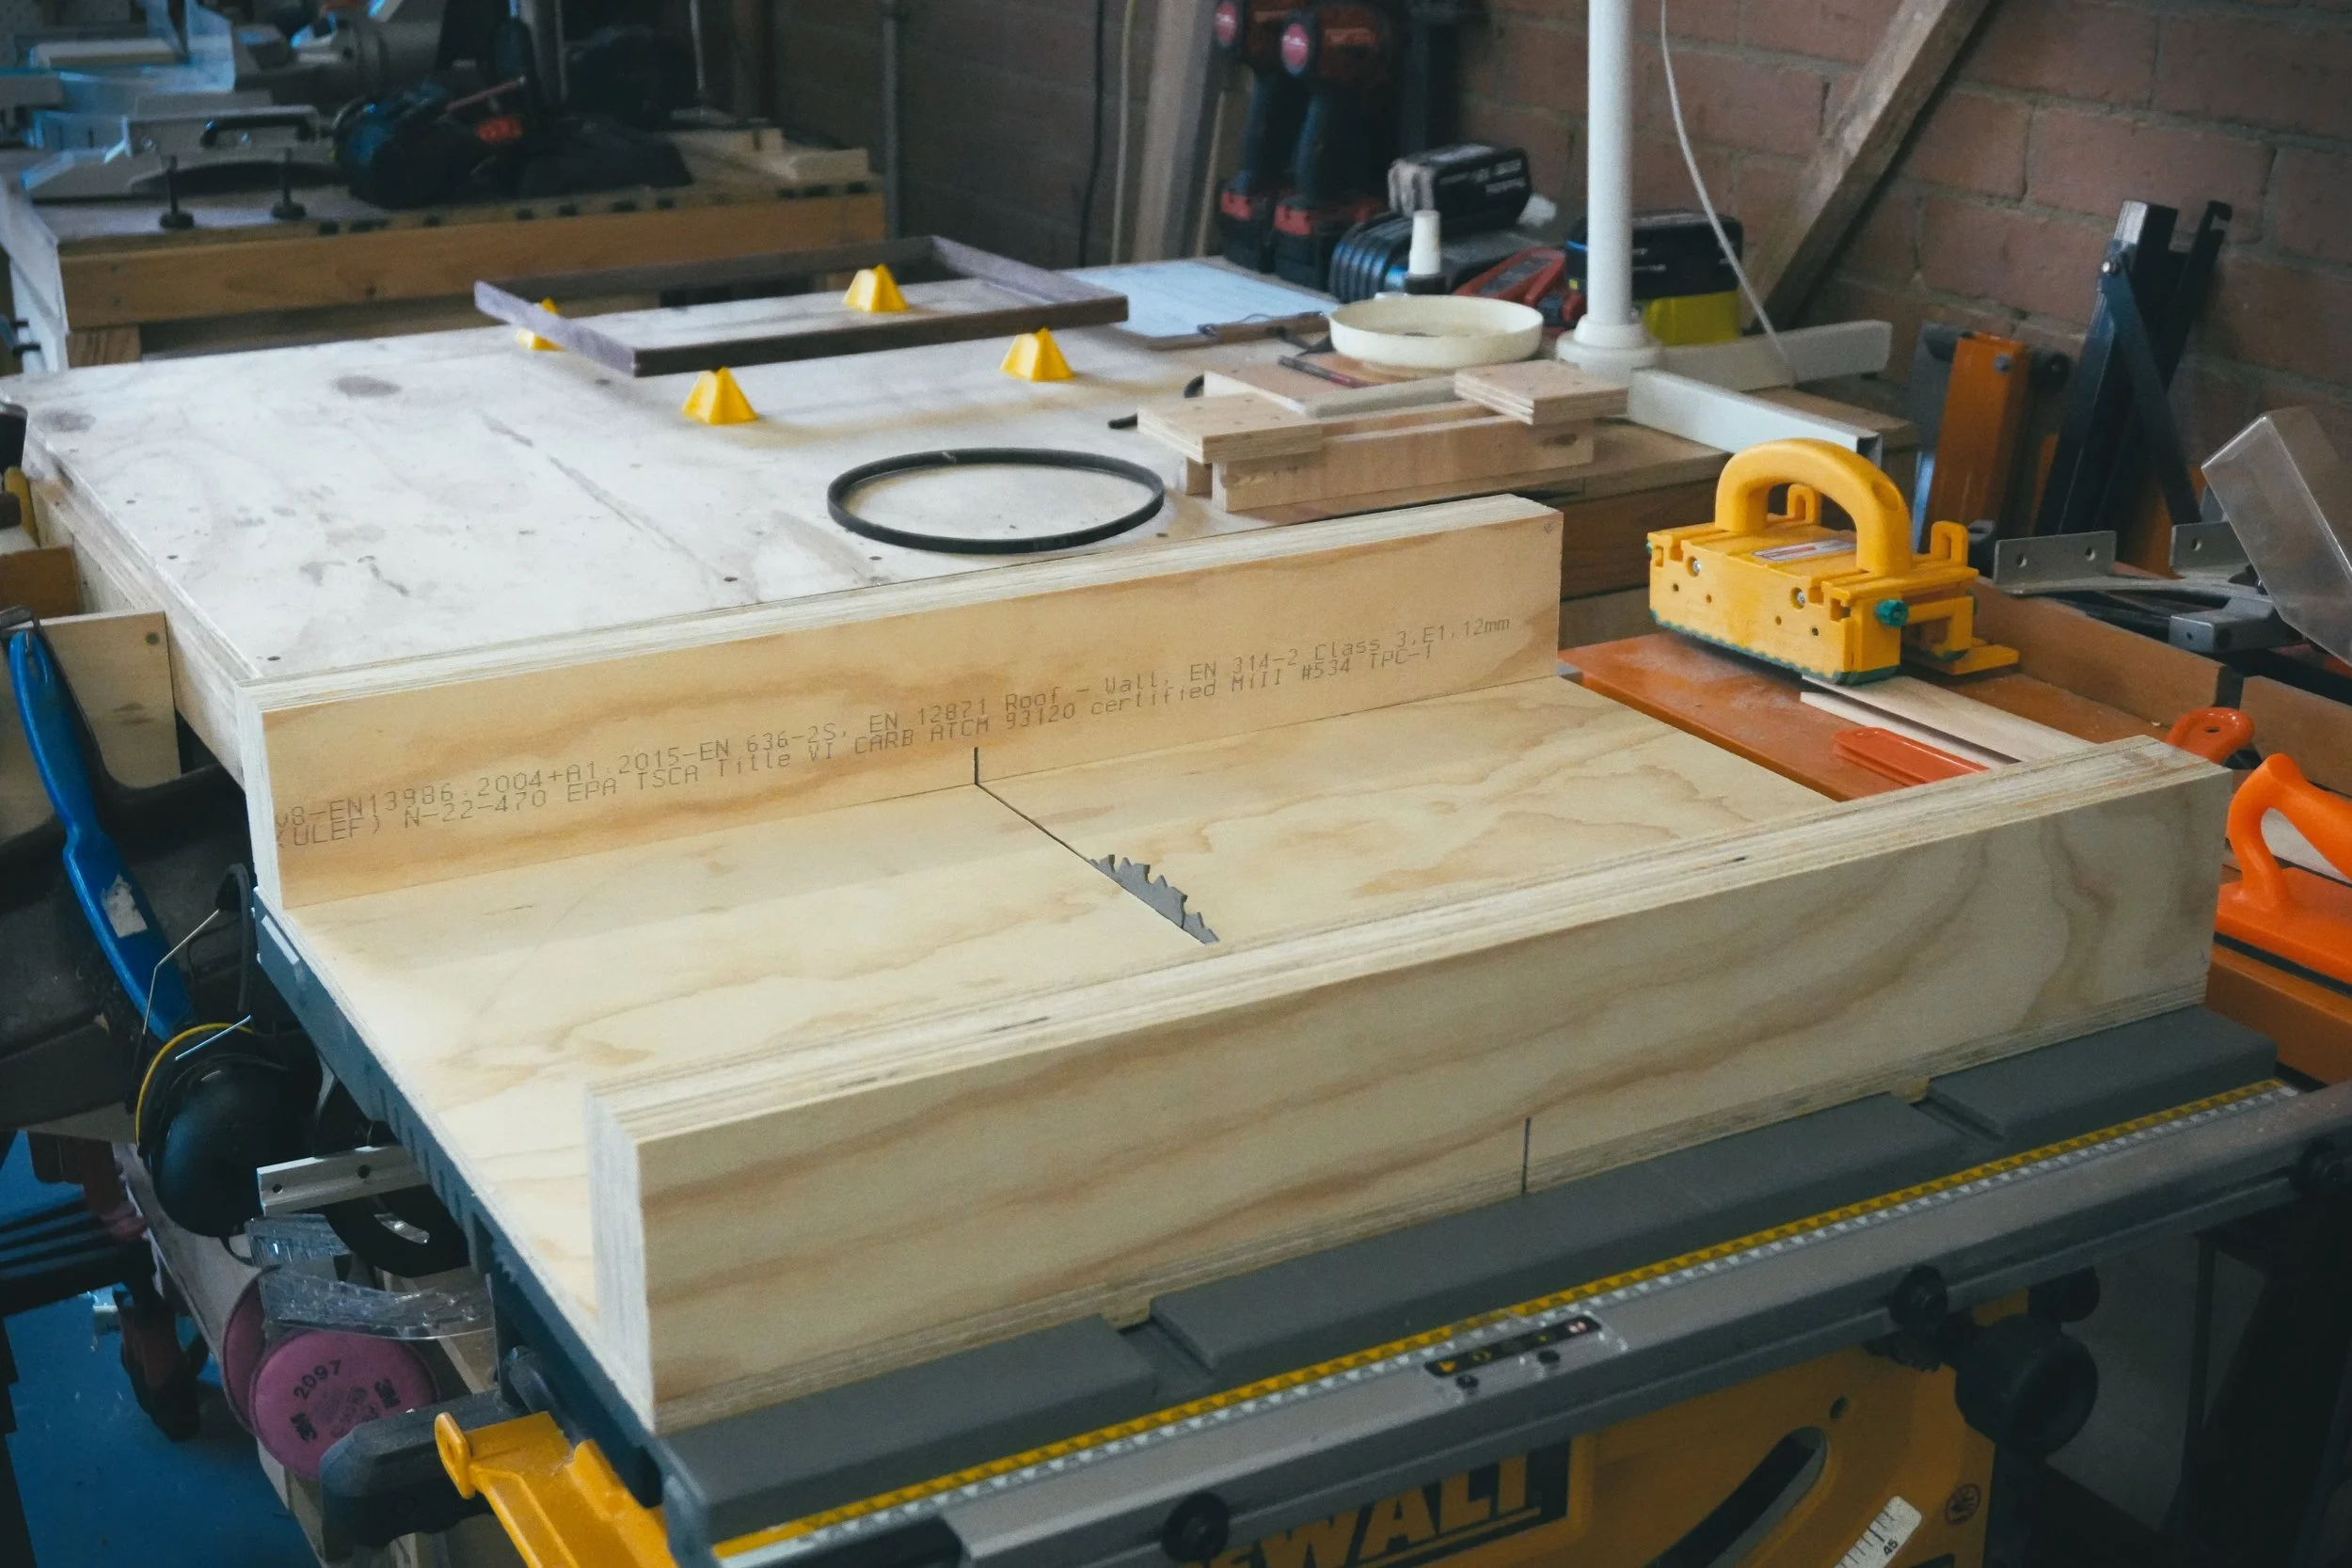
Once you're happy with how square the fence is, take the sled off the table saw and raise the saw blade. Then, with the saw on, place your sled down on the edge and push it through into the blade. Stand to the side as you do this, the blade will emerge up through the fence, so keep your hands well clear of its path. With that, you've completed your crosscut sled.
Add-ons for the Sled
There are some very nifty add-ons that will take your sled to the next level:
T-track: you can add this to the front fence for mounting accessories like a stop block, or you can set the track into the base of the sled and use it for hold-downs.
Stop block: a stop block, bought or built, is a really good addition to the sled, as it makes repetitive cuts a breeze without having to remeasure every time.
Final Thoughts and Things I Would Change
I hope this blog has given you the confidence to build your own crosscut sled. I want to finish off by going over a few things about my own sled that I'd like to improve or change.
The main one I've come to realize after using the sled a lot is that it's far too large for the tasks I do. So I plan to move to a smaller design with one front fence.
Also, when I built my sled I always intended to add some add-ons, but as I used it less and less because of its size, I left them out. So that's something I'd like to revisit and upgrade.
Finally, I made the slides myself, and over time they've begun to grab more and more in the slots. I don't have a 3D printer, so I think I'll try upgrading them to bought adjustable ones.
That's it for today. I'd love to hear what add-ons or upgrades you think are a must-have on a crosscut sled, and I'd love to see the sleds you've built. If you'd like to follow along step by step, you can grab my full crosscut sled plans here.
These DIY plans show you how to build a table saw crosscut sled for safe, accurate and repeatable square cuts. Suitable for all skill levels, with a supply list, cut list, cutting diagram and step-by-step assembly guide.
🔨 What's Included:
PDF File: Comprehensive step-by-step instructions to guide you through the assembly process.
3D Model: DAE File and STL File
🛠️ Here's what you can expect to find within the plans:
1. Supply List: A comprehensive inventory of all the materials you'll need to construct the crosscut sled, ensuring you have everything required before you begin your build.
2. Cut List: A detailed breakdown of all the pieces that need to be cut, enabling precise assembly and minimizing material waste.
3. Cut Diagram: Clear and efficient diagrams illustrating the most effective way to cut your supplies, optimizing material utilization.
4. Step-By-Step Assembly Guide: Meticulously outlined instructions guiding you through each stage of the sled assembly process, making it easy to follow along and achieve excellent results.